Monday, May 25, 2026

Autodesk Assistant in Revit – Tech Preview: Your AI Support to Create More and Work Smarter

Autodesk Assistant in Revit – Tech Preview: Your AI Support to Create More and Work Smarter 

Autodesk Assistant introduces a new, conversational way to interact with Revit. Instead of navigating menus or searching for documentation, you can:

  • Ask questions about Revit features
  • Query and explore your model
  • Take action through natural language prompts such as “Create a door schedule sorted by level” or “Create a floor plan for the level L1 and name it “L1-AI”
  • Receive personalized insights such as the new “Numbering” tool, based on your activities within the documentation workflow.

All through a simple chat interface embedded directly in Revit.

Saturday, December 28, 2019

NITI Aayog officials said BIM could save up to 20% of the project cost

In a move that will give a boost to infrastructure and housing projects across the country, the government is considering the latest building information and modelling (BIM) technology to fast-track construction work. The move will also help optimise the cost of housing construction and in achieving the government’s target of housing for all.

According to the latest report by the Ministry of Statistics and Programme Implementation, at least 355 projects have seen a cost overr ..

Monday, March 12, 2018

Keep Revit file healthy and avoid corruption of the file by following certain things.

1. Audit file regularly, 

2. Working on latest Revit Build

3. Clean temporary files regularly, 

4. Avoid linking/importing CAD(dwg/dgn) data. See more details here on importing CAD.


5. Reduce warnings 


6. Reduce use of Third Party application.


7. Avoid importing complex geometry.


In Worksharing environment, 


1. Create new local file regularly.


2. While saving use Compact Central Model


3. On Collaboration for Revit, if you are getting errors, clear corrupt & damage model from the system


Further, you can go through the journal file to locate the issues, here is the information on how to read the journal file.


Also, read the Autodesk Knowledge Network article on What causes data corruption


Wednesday, September 7, 2016

More than 30 ways to find the missing element in Revit

More than 30 ways you can find the missing element in Revit 

1. The object or category is temporarily hidden
2. The object or category is hidden in the view
3. The object is being obscured by another element
4. The object's category or subcategory is hidden in the view
5. The object is outside the view's view range
6. The view's far clip depth is not sufficient to show the object
7. The object resides on a work set that is not loaded within the project
8. The object resides on a work set that is not visible in the view
9. The object resides on a work set that is not loaded in a linked file
10. The object resides on a work set that is not visible in a linked file
11. The object resides within a group (detail model) and it has been excluded from the group
12. The object is part of a design option that is not visible in the view
13. The object is part of a linked file that is not visible in the view
14. The object has one or more of its edges overridden to display as ''
15. The object is a family and none of its geometry is set to be visible in the view type
16. The object is a family and none of its geometry is set to be visible at the view's detail level
17. The object is set to not be visible at the category's detail level
18. The element has been placed outside the view's crop region (visible extents)
19. The element is an annotation object and does not reside entirely within the annotation crop region
20. The object's phase settings or the view's phase settings prevent the object from displaying in the view
21. The view's discipline is prohibiting the visibility of the object
22. The object is affected by a filter applied to the view
23. The object is subject to an element override, set to background color
24. The object is subject to a category override, set to background color
25. The object style is set to background color
26. The object is constrained to a scope boxes that is not visible in the view
27. The extents of the object itself don't permit it to be seen
28. The object is a mass, and 'Show Mass' is turned off
29. The object's host view has been deleted (area boundaries)
30. The view's scale is prohibiting the object's visibility
31. The object is a linked instance with coordinates too great for Revit to handle
32. The user has incorrectly identified the link instance to which the element belongs
33. The object is in a link that is not in its correct position

Monday, September 5, 2016

Revit, Insight 360 & Collaborating BIM models in A360, 7th September 2016

Design without compromise.
Now Review projects in real-time. With no downloads, simultaneously review, comment and iterate ondesigns. Stakeholders make decisions together, navigating through models and sharing comments within a browser or on a mobile device.
Discover a Fast, Intuitive Outcome Driven Guide to Better Building Energy & Environmental Performance throughout the Building Lifecycle.
Agenda:

    •   A360 Collaboration for Revit
    •   Autodesk Insight 360
    •   And What's new in Revit 2017 
Register Now : https://attendee.gotowebinar.com/register/6366680676101524996
Webinar Details:
Date: 07th September, 2016 (Wednesday) 
Time: 03 PM to 05 PM IST 
Presenter: 
Niranjan Kamath,
Technical Specialist.

Thursday, May 19, 2016

Compatibility issues with C3D 2017 and older versions

Civil 3D 2017 was recently released but be careful before upgrading. The last 4 previous versions (2013, 2014, 2015, and 2016) were all compatible with each other, but 2017 is NOT backwards compatible.
If you open an older Civil 3D drawing using Civil 3D 2017, and save it, it will be in the new format and you will not be able to edit it in any older version such as 2016, 2015, etc.
Note that the “AutoCAD DWG” format is the same (named 2013). You can open a Civil 3D 2017 drawing in any version (2013-2016) of Civil 3D, but when you do so, the Civil objects will become proxy objects and be of no use, The prospector will be rendered inoperative for that drawing also.
When you open an older Civil 3D drawing in 2017, you will get this warning dialog:
AEC Warning Dialog
If you open a Civil 3D 2017 DWG in an earlier version, you’ll get this message.
AEC Message Warning
…and the prospector for that DWG will look like this, with no ability to see or manipulate objects.

2014 Prospector for a 2017 DWG

Wednesday, May 20, 2015

Top advantages of Project Parameters

Advantages of Project Parameters in Revit
  1. Sorting/Grouping in Schedule – You can add parameter like Tower number, which can help in sorting while scheduling

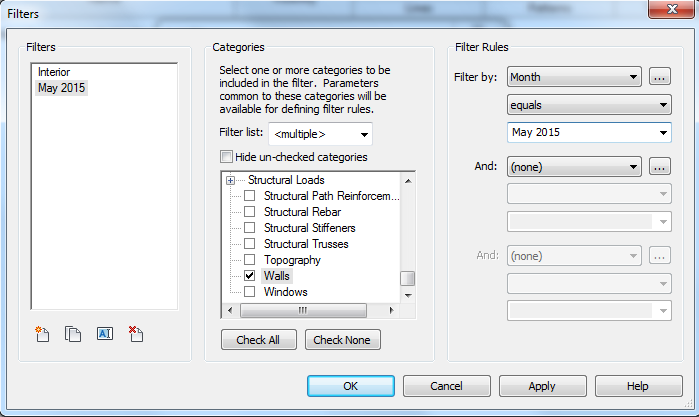
  1. Color coding by using Filter- You can add parameter like Month, which can help in filtering to color code in filter

  1. In Navisworks for making sets- You can add parameter like Activity, which can help make sets in Navisworks & which later can be used in Timeliner.

  1. For adding useful information while building As-built model.

Saturday, May 16, 2015

Points of Revit Topography in text file via Dynamo

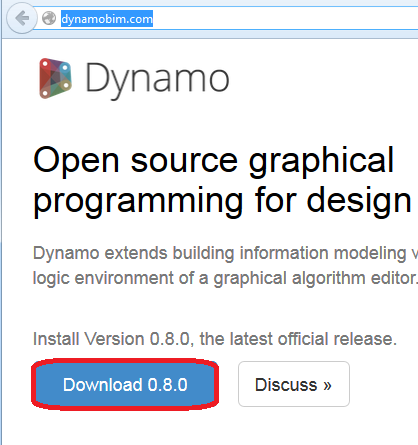
You need to install Dynamo, click here
Open Revit file with topography & select Dynamo under Add-ins menu
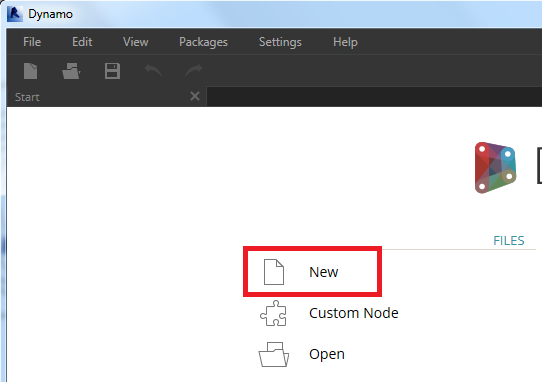
This will open Dynamo window, hit New
We are now in Dynamo file
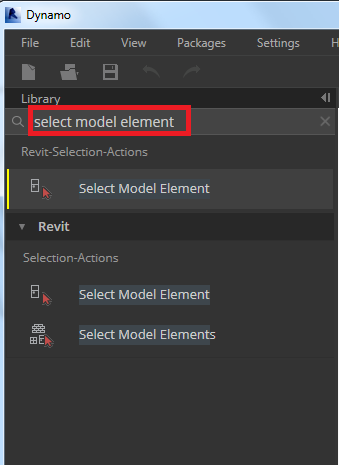
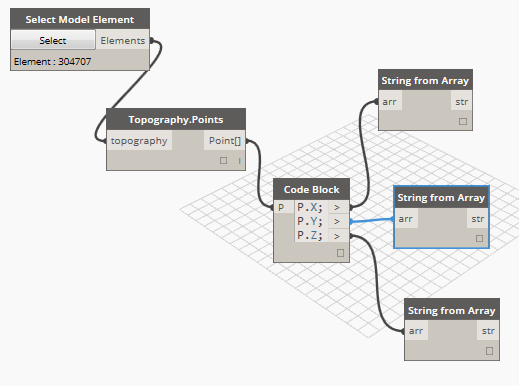
In search at top left corner, type select model element.
You will see the options coming up to select, select “Select Model Element”
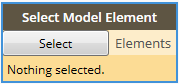
Below tab will pop-up to select the element
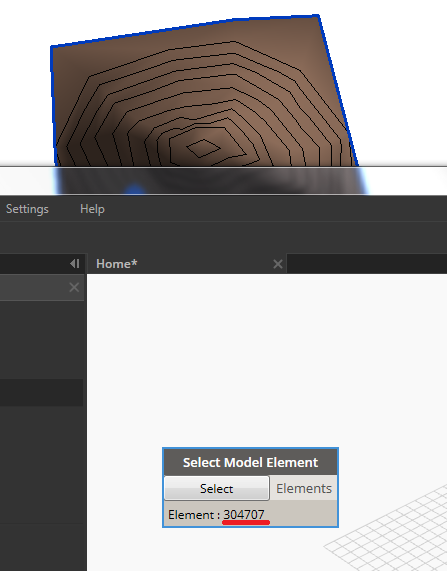
Hit Select in it & select the Topography in Revit
See that after selecting element id will be shown
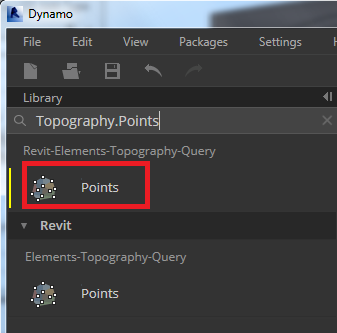
Now in search tab type Topography.Points & select Points shown below

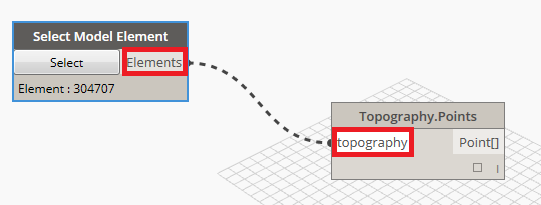
Select Elements & topography, as shown
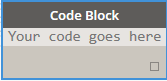
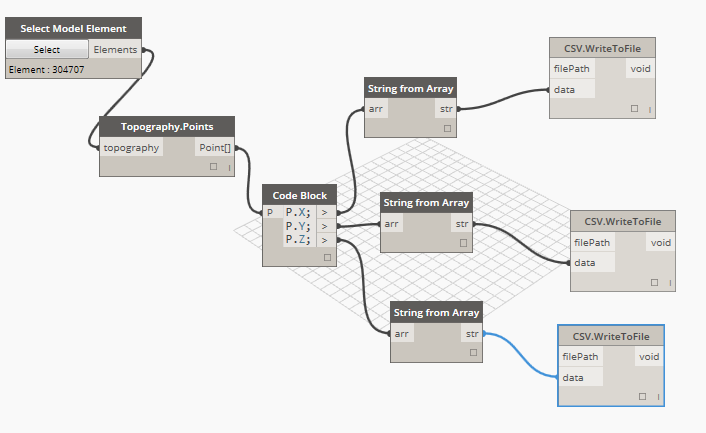
Now search Code, select Code Block
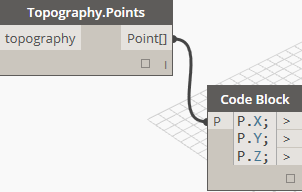
In Code Block, Type P & hit cursor outside
Now after P type .X; enter, type P.Y; enter & type P.Z;
Link above to Points in Topography
Search for string from array, link this tab to code block as shows
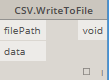
Now search for csv. & select WriteToFile
Below tab will appear
Link it as below
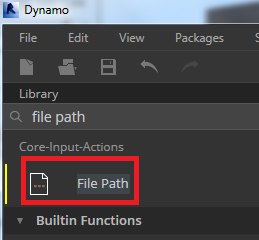
Search for file path & select the one shown below
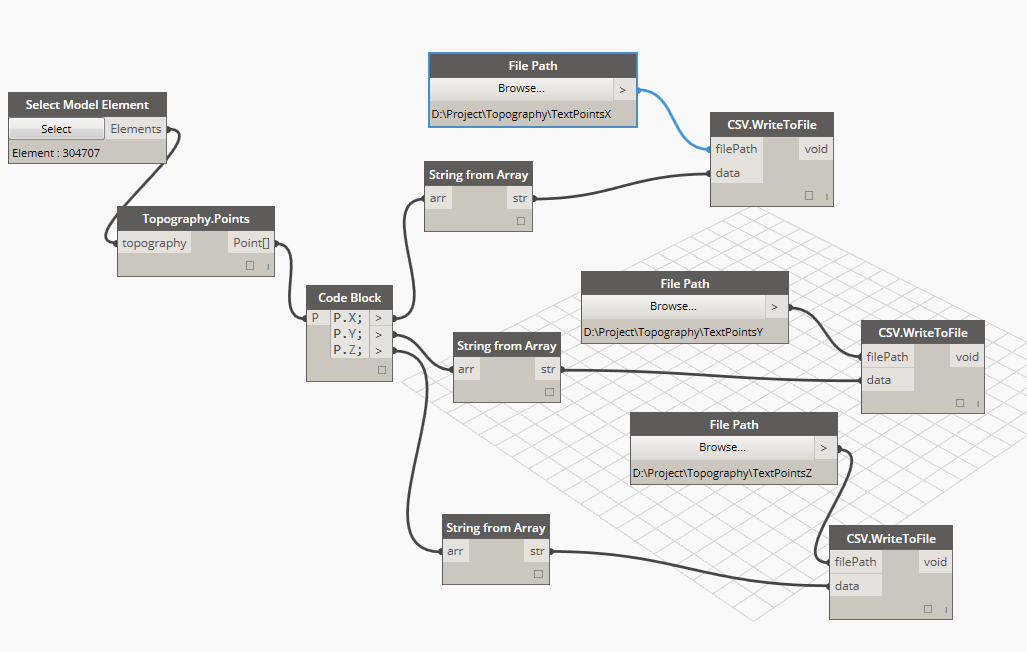
Link it with filePath of CSV.WriteToFile
Hit the Browse tab in File Path to save the text file, remember to give separate name else files will override each other
This will give you three separate text file of points
Enjoy

Friday, May 15, 2015

My First Certificate for Revit


Built basic data to start modeling in Infraworks 360LT

Doble click below Icon
InfraworksIcon.png

Above Icon is for Autodesk Infrawork 360 LT, available with Autodesk Infrastructure Design Suite Ultimate 2016 & Autodesk Building Design Suite Ultimate 2016 subscripted members.

This will open below to sign-in your account, as Infrawork 360 is a cloud based service provided by Autodesk.

Autodesk sign-in.png

Once sign-in is done below window appears

Infraworks-window.png

To generate the basic data to start with project hit model builder

ModelBuilder-Icon.png

Below Model Builder window will appear

Initial-ModelBuilderWindow.png

We will take example of Powai, Mumbai area as I work there:smileyhappy:

In search type Powia, Mumbai, India

Search-Powai.png

To change the view I will select below under Road drop down,

Satellite-View.png

Above will change view to satellite view

Satellite-View01.png

Below are the options to select the view

Option to select.png

I will select, the draw polygon option

Put the name of the file in left bottom corner & hit Create Model

Polygon area select.png

This will show you below window, close this & wait for a while

model building.png

You will get the mail & also now can see the file in Infraworks, hit the file to download & open.

Powai File present.png

Once opened you can see below

View is ready for you.png

Enjoy:smileyhappy:

Thursday, May 7, 2015

Autodesk finds system & graphics hardware for you

Goto website click here

Select the required this as shown below & hit find button,

01.png

You will get the required results as below,

02.png

I am Dell fan so selected Dell as a manufacturer:smileyhappy:

Tuesday, April 28, 2015

What increases Revit file size?

  1. Family
In Place family drastically increase the file size, thus reduce the use of the In Place Families. Try to replace them with Component families.
Component families which contains unnecessary details like bolts & small size openings, etc. This increases the Project file size in multiples. Try to simply them & keep size limit of 300kb max.

  1. Detailed Model Fill Patterns
Model fill patterns containing a large number of segments will greatly increase a Revit project size.  This typically occurs when a detailed hatch pattern [.pat] file is used to define a new fill pattern.  If when possible avoid the use of detailed custom model fill patterns to optimize the file size.

  1. Raster Images & Rendered Views
For every inserted image or rendered image saved to the project, the project size will increase.
All of the inserted images, along with an instance count, can be viewed under Insert > Manage Images.  Unneeded images can easily be deleted from this menu using Delete.

For rendered images saved to the project, by default they will be saved under the Renderings Project browser organization.  They appear under the Manage Images dialog as well.

  1. Importing/Linking CAD files
Importing non-native files is going to increase the size. Thus reduce use of any non-native file in Revit.

  1. Use of Group & Array
This will multiply the size of the Revit file. Try not using them.

  1. Use of too many section views
Delete the section views which you think are of no use.

  1. Using too many small openings in walls & slab
Every small opening will add the file size, try avoiding small openings

  1. Avoiding Warnings
Remove warnings as much possible, this will keep Revit project file in good health.

Monday, April 27, 2015

Quick way of creating 4D in Navisworks

Will first make 3D views in Revit with separate section box,

Brief on making section box in Revit 3D view

I have tall building structure, in which there are several basement & floor above
01.png

Will first create section in plan


02.png

In section set the view

03.png
In 3D view set the view to section you created


04.png

Name this view as Basement (You can give appropriate name as per your activity)

Similarly create the 3D views for other Basements & floor above

From each 3D view export NWC & save

05.png

Now append this NWC files in Navisworks

06.png

While attaching the objects in Timeliner, Switch off the levels which are not related to activity, like if the activity is related to Basement3 switch of the other levels. This way you will only concentrate to that level only.

Attach the element by drag it on Task

07.png
Put planned dates & see that you have selected Task Type

08.png

Now play the simulation

09.png

This is a quick way in creating 4D of the tall building:smileyhappy: